The epistolary method of communication over the years has turned from a paper form into an electronic one. There are 200 mail services on the Internet, with the help of which users communicate and send data via e-mail. Each online mailer has its own structure and individual interface, but along with this, programs have been developed that work with mail without a browser. The question arises of how to correctly create an external electronic address in a computer program. Mail.ru setup example - Outlook will help you answer it.
Local mail client
On the Internet, software developers offer users a choice of software that acts as an electronic client. Each local mailer has an individual interface and useful features. But is it worth loading a computer with programs if mail services are available for browser use? Yes! Proof of this is Microsoft Outlook 2013 and Outlook Express clients. The very setup of Mail.ru mail in Outlook usually does not take much time for users.
A person usually has two or three email addresses that he uses regularly, but these accounts are registered onindividual online services. Of course, it is allowed to operate with one mailer, setting up personal boxes on it. But in this case, the external service does not guarantee that an email with a foreign domain name will be sent correctly.
The Outlook interface was created for users regardless of the level of computer skills, so setting up an online resource is considered on it. An example of an external service will be the online mailer Mail.ru.
What you need to set up Mail.ru - Outlook
Before proceeding directly to work, it is worth checking:
- Account registered on the Mail.ru website.
- Installed Outlook.
If the MS Office package was previously present, the mailer will be found among the list of standard software. Outlook 2013 or Outlook Express can be downloaded as a standalone feature
Setting up Mail.ru mail in Outlook 2013
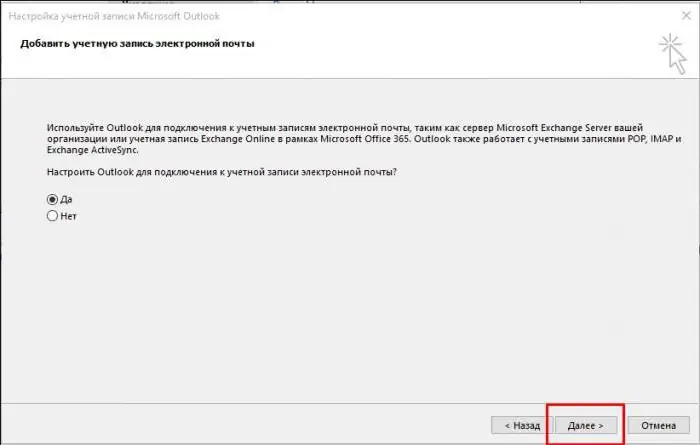
- Starting the program "Microsoft Outlook 2013", agree to the terms of the account.
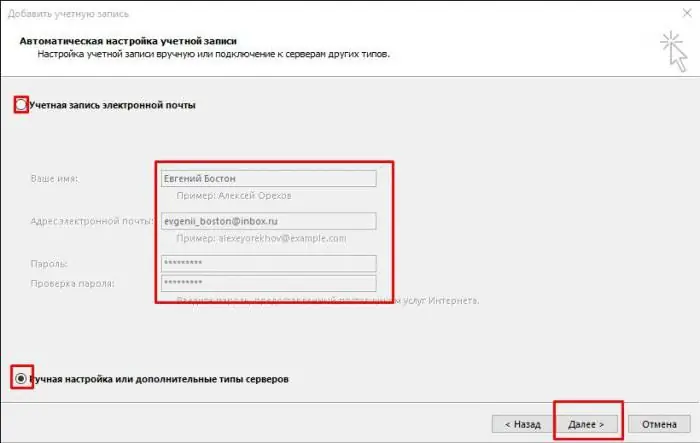
- Indicate in the account:
- name displayed to recipients;
- email address registered on Mail.ru;
- mail password.
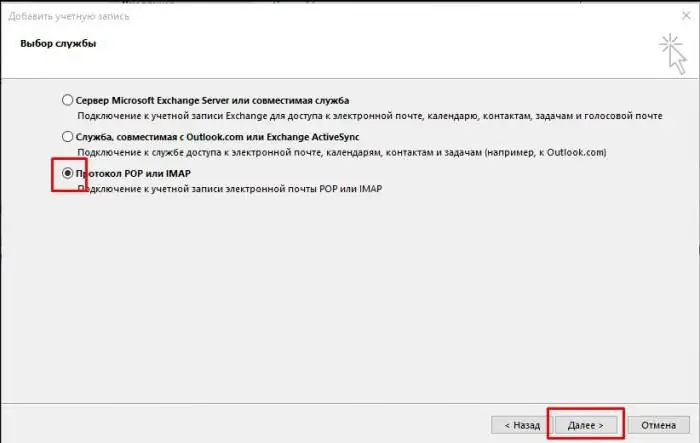
3. Select the connection protocol.
4. Specify user parameters and server information.
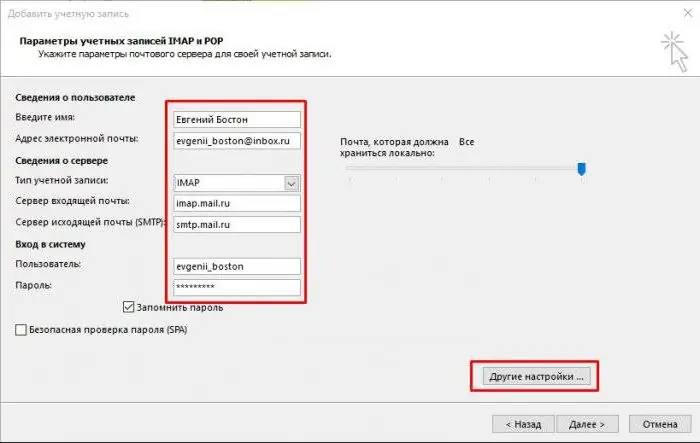
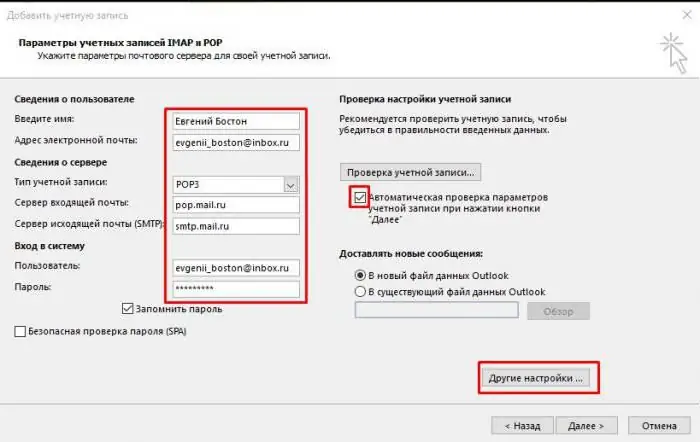
It is worth considering that forIMAP incoming mail server - imap.mail.ru; for POP3 - pop.mail.ru.
Next, you need to configure additional settings.
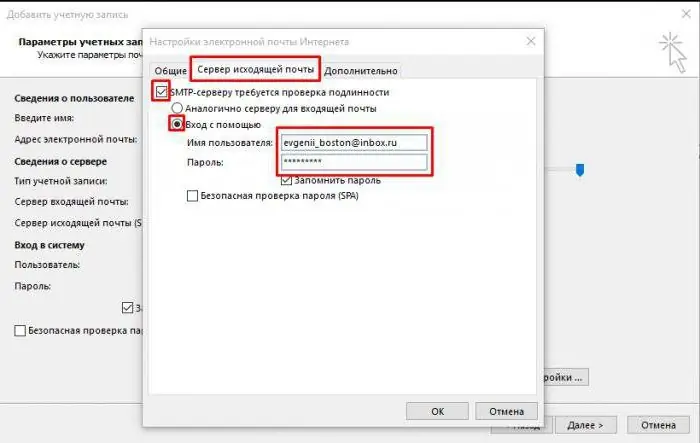
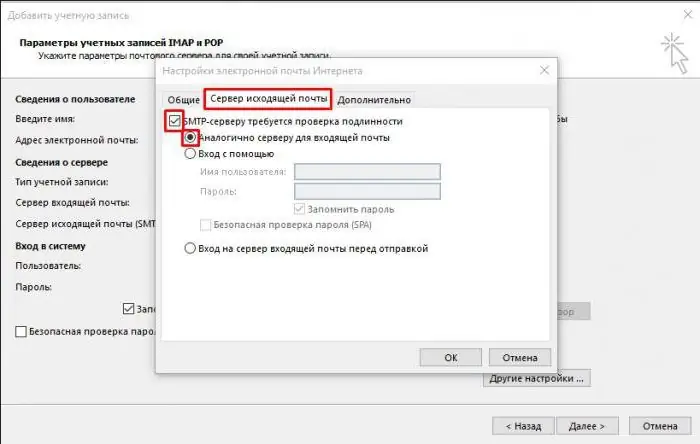
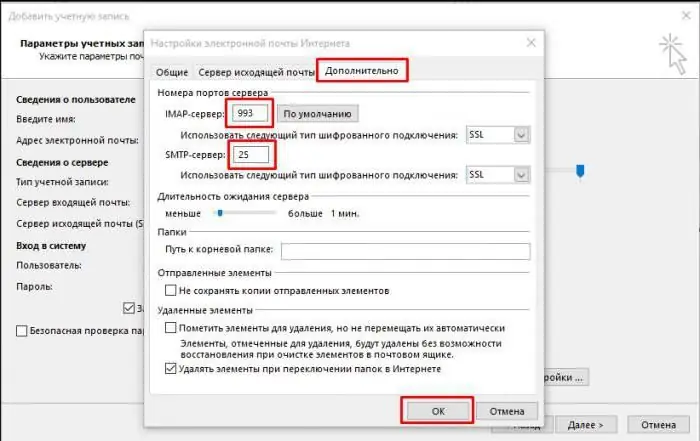
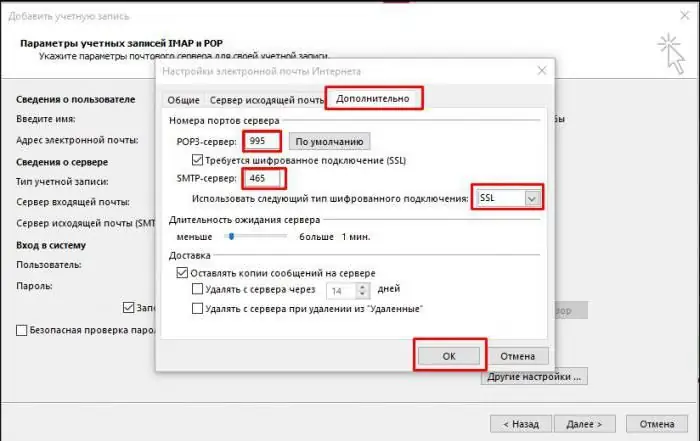
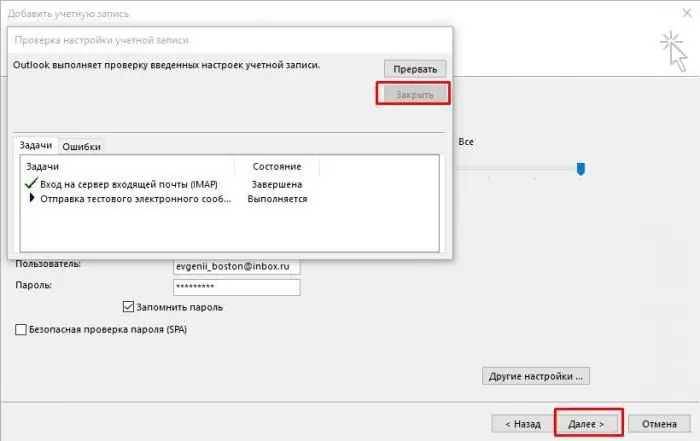
Instructions for setting up Outlook Express - Mail.ru
1. In the "Service" tab, go to "Accounts".
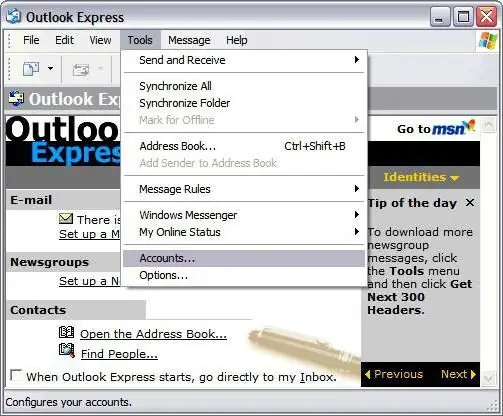
2. "Add" button, then "Mail":
- enter the name that is displayed in the letters of the recipients;
-
e-mail address registered on Mail.ru.

outlook express mail ru 
outlook express mail ru
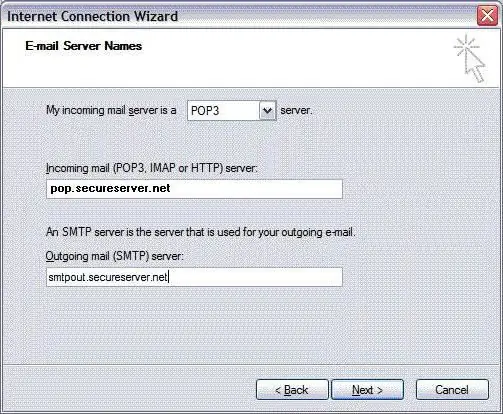
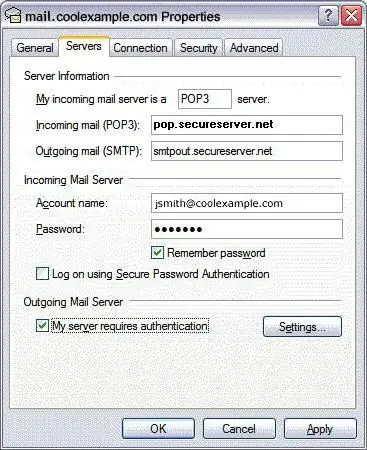
3. Data for outgoing and incoming servers are indicated:
- choose IMAP or POP3 protocol;
- specify the incoming mail server: imap.mail.ru - for IMAP; pop.mail.ru - for POP3;
- outgoing mail server for two protocols - smtp.mail.ru.
4. Next, the name of the mailbox @mail.ru (bk.ru, inbox.ru and others) is indicated. The password corresponding to the account is entered.
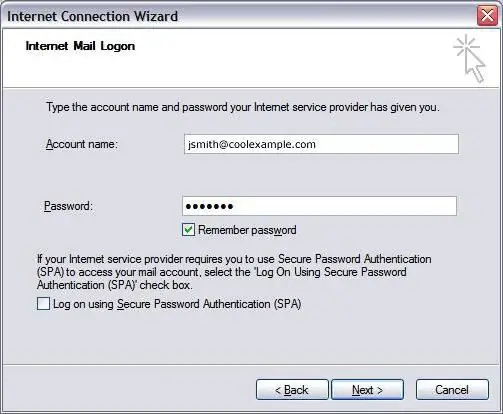
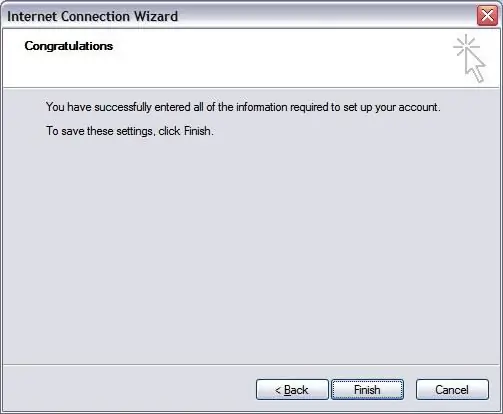
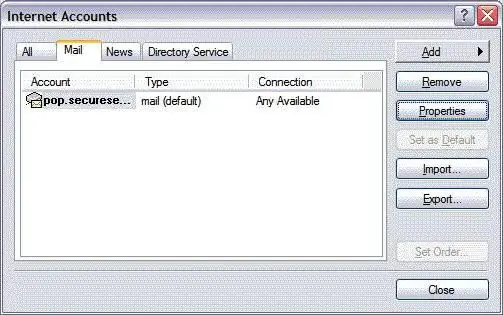
5. When setting up an Outlook account - Mail.ru is completed, you need to open the "Properties" of this account.
6. In the "Advanced" tab, enter the ports for receiving and sending letters.
7. We allow downloading folders from the specified servers.
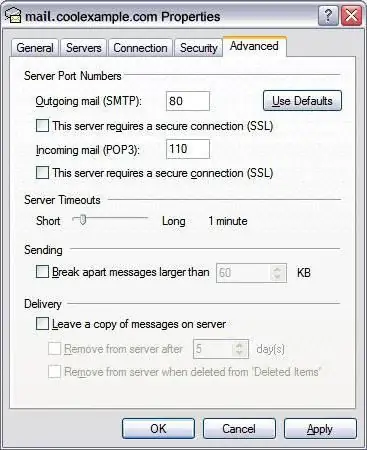
8. Account set up.
What are the nuances to pay attention to
During the setup of Mail.ru - Outlook, problems may arise that are easy to fix. The main thing is to follow some rules:
1. The account is indicated by the full name with the inclusion of the "doggy" icon and the domain ([email protected]).
2. The username of the recipient's mail in the "From:" line can be different, it is not necessarily the name and surname of the sender.
3. Carefully check the input ports of the incoming / outgoing server.
4. To copy the information received by the local mail client to an external resource, uncheck the "Delete copy from the server …" box.
After installing a local Outlook mailer and setting up Mail.ru - Outlook, the user will be able to receive and send messages, as well as a number of additional functions.
1. Managing an external mailer account will become easier.
2. Message filtering is set by individual sender; on the topic of the letter; a single word or subject line.
3. Archiving messages and further processing is much faster.
4. The contents of the folders are organized according to preferences.
5. Creationmailing lists will become easier.
6. A local mailer will help you organize and plan your working day thanks to the calendar. This feature allows the user to create a schedule and set reminders.
7. The Outlook address book can be synchronized with mobile operating systems by transferring contacts to or from the phone. In addition, business cards are created for each participant in the address book with information about the location, company, phone number, and more.
8. The Outlook messaging system allows you to send and receive voice mail.


