In places where cabling using Ethernet and FTTx technologies is difficult or impractical, Rostelecom uses existing telephone lines to provide Internet access to consumers. In this case, users need to purchase a special device (modem) that coordinates the digital circuits of the computer with the analog coded signal of the ADSL provider. If a consumer creates a local network, a separate router (router) will need to be purchased.
TP Link TD W8151N combines the functions of both devices. It is the best alternative in this case. Using the recommendations outlined in the article, the owner of the modem router will be able to independently install, connect and configure the TP Link TD W8151N Rostelecom.
Router appearance
CaseThe product is made of white plastic with a large number of decorative holes for natural ventilation.
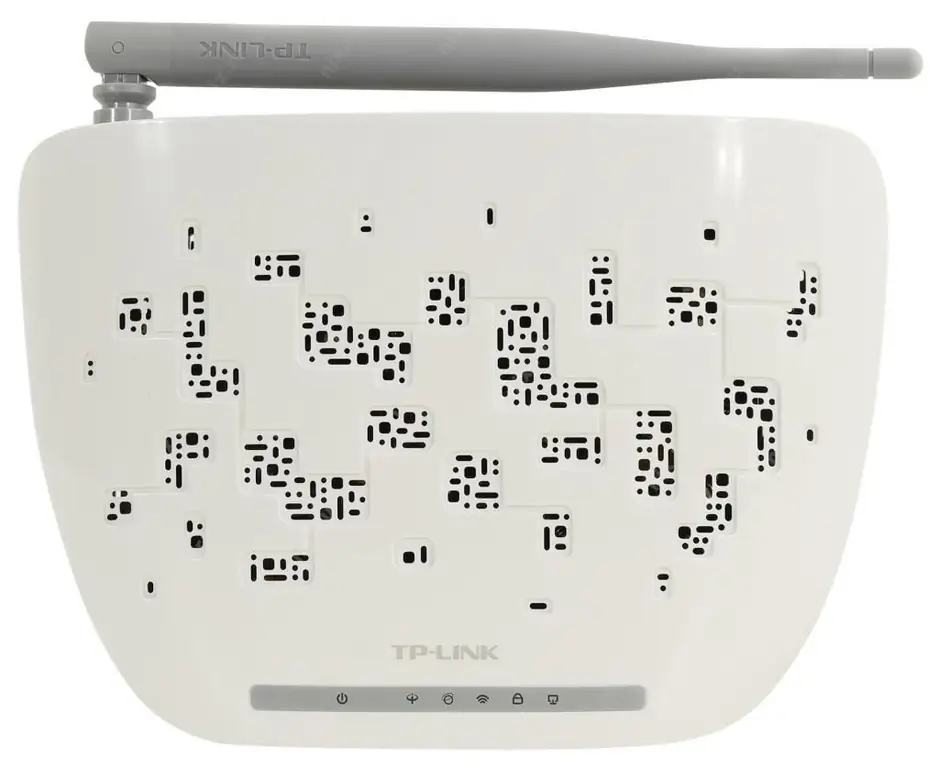
The front panel is occupied by a line of illuminated icons informing the user about turning on the router, connecting to the provider via an ADSL line, working on the Internet, the status of the WI-FI module, and the operation of the WPS secure synchronization mode.
On the rear panel there is a WAN port connector (RJ-11 type) for connecting to the line of the Rostelecom provider and a LAN port connector (RJ-45 type) for connecting a desktop computer (PC). There is also a socket for connecting the power supply and the POWER button to turn it on (ON / OFF). Nearby are the buttons for turning on the WI-FI module, secure connection to a wireless network (WPS), resetting the settings to factory defaults (RESET).
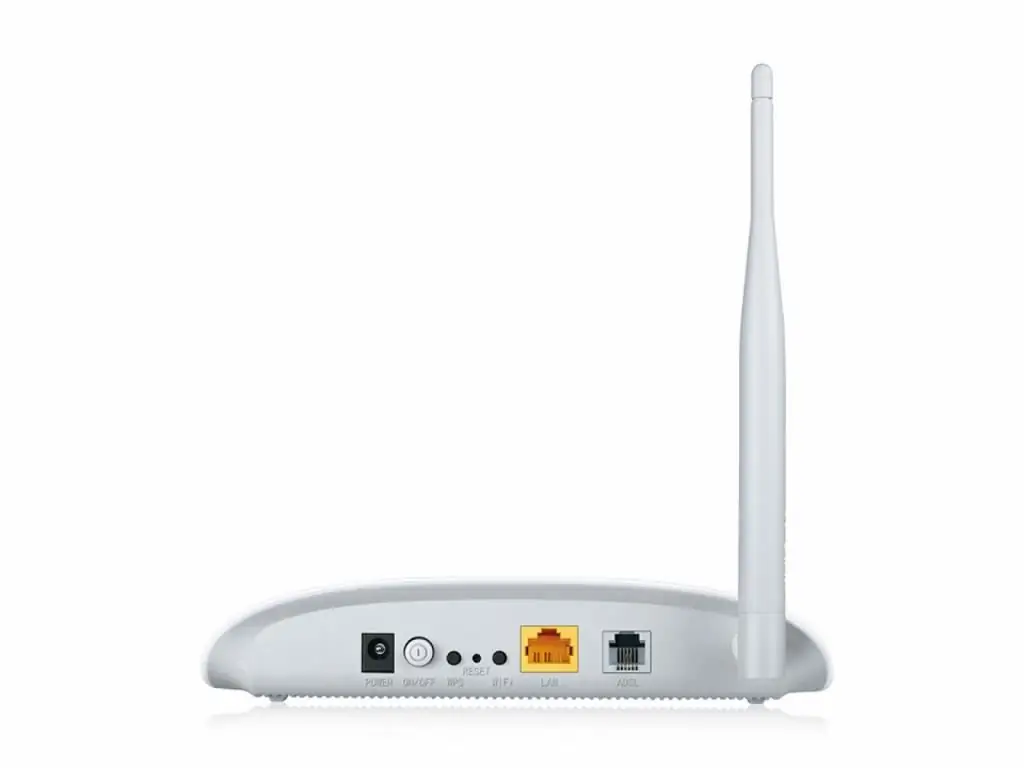
The fixed WI-FI antenna has a swivel mechanism that allows it to be oriented in different planes.
Package set
In case of purchasing a router in a distribution network, before installing and connecting the product, the user must check the original package. The basic package includes:
- router TP Link TD W8151N;
- AC adapter "9V 0.6A";
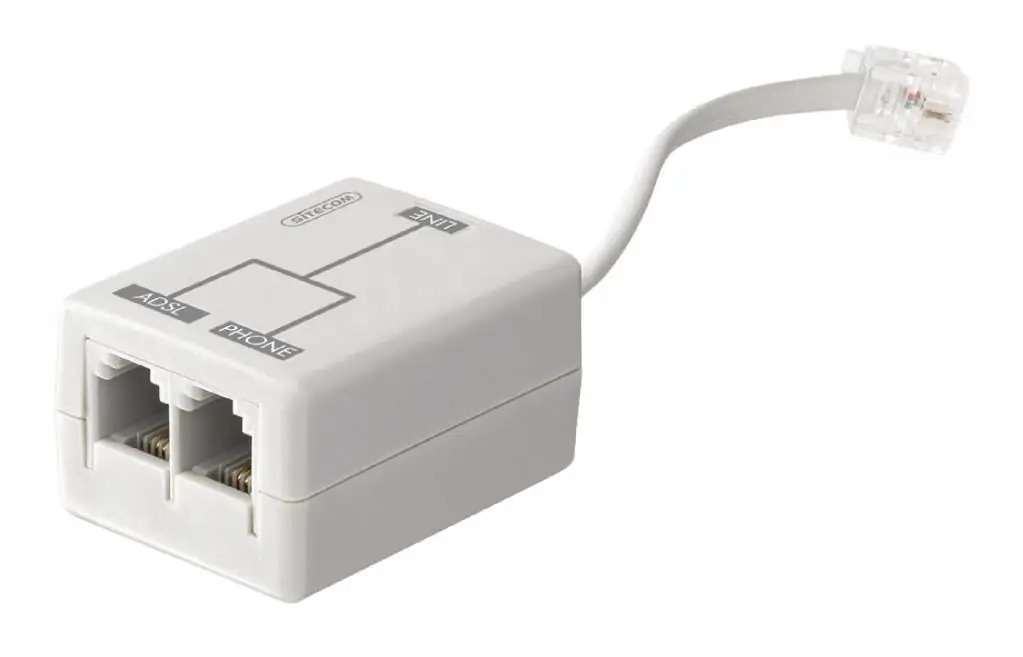
- splitter that divides the input telephone line into 2 separate connectors;
- 2 cables with RJ-11 connectors for connecting a telephone set and a router to a splitter;
- cable (patch cord) with RJ-45 connectors for connecting a computer to a router;
- documentation kit.
Before connecting equipment for organizing a home local area network, the user should carefully read the materials contained in the attached documentation.
Connect equipment
The installation location of the router should be selected in advance, taking into account the proximity of AC outlets in the room, achieving the maximum coverage area of the wireless network area. The connectors for connecting the ADSL line of the provider, the telephone set and the WAN port of the router with cables from the delivery set are marked on the splitter case.
The LAN port connector of the router is connected with the supplied cable to the RJ-45 configuration connector of the computer (PC). The power adapter is connected to the plug connector of the router last and the POWER button is pressed to the ON position. After the alarm indicator on the front panel lights up, the router is ready for configuration.
Preliminary work
Before setting up the TP Link TD W8151N router, the network card of the computer connected to its LAN port must have a certain configuration. It should be configured to automatically obtain IP and DNS server addresses. To check, on the computer connections page, right-click on the image of its cable connection with the router and open the "Properties" item in the drop-down menu.
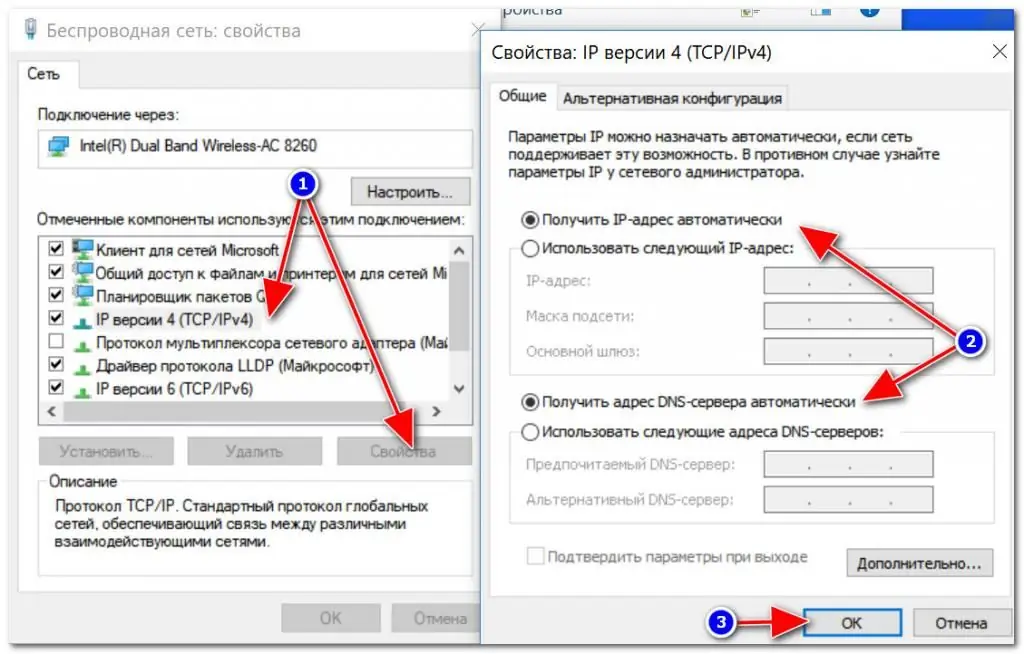
In the new window select the TCP/IPv4 protocol and in its properties check the checkmarks in the columnsreceive addresses automatically. If the requirement is not met, you must do it manually and confirm the action by pressing the OK key.
Entering the router interface
The TP Link TD W8151N Rostelecom modem is configured in its interface. To enter it, you need to enter the address of the router on the local network in the address bar of any web browser that is used on the computer. Information about it is available on the label attached to the bottom of the product. Here you can also find the authorization parameters required when logging in.
The address required to configure TP Link TD W8151N Rostelecom is a combination of 192.168.1.1. After entering it and pressing the Enter key on the keyboard in the window that opens, you need to enter the initial authorization data - admin / admin. The main page of the interface becomes available after pressing the "Login" button.
Quick setup
Depending on the firmware, the menu software may be presented in different languages. Before configuring TP Link TD W8151N Rostelecom, it is recommended to change the factory administrator login password for security purposes. This can be done in the "Maintenance" section of the "Administrator" tab. You need to come up with a new password and confirm it. After pressing the "Save" button, the router will reboot. The next login must be done with a new administrator password.
You must first carefully read the parameters specified in the contract. They will need to be entered when filling out the corresponding pages. In the "Quick start" section, press the key"Setup Wizard". In the window that opens, select the time zone and click the "Next" button. The next step is to note the type of connection provided by the provider. For ADSL, Rostelecom uses a PPPoE connection. After clicking the "Next" button on the page that opens, the fields marked in the contract are filled in: username; password; VPI/VCI; PPPoE LLC. Entering values is completed by pressing the "Next" button.
In the new window, you must enter data that determines the operation of the wireless network. The name (SSID) is invented independently. The access password must contain a set of English letters of different registers, numbers and be at least 8 characters long (preferably 10-25). The rest of the default values can be left unchanged. After entering the data, click the "Next" button. The next window informs you that the quick setup is over and prompts you to check the entered parameter values. If there are no comments, then by clicking "Next" again, you can read the message about the successful completion of quick setup.
Interface setup
Configuring TP Link TD W8151N ADSL Rostelecom, performed in the "Quick Start" mode, covers all the parameters necessary for the router to work in the local network.
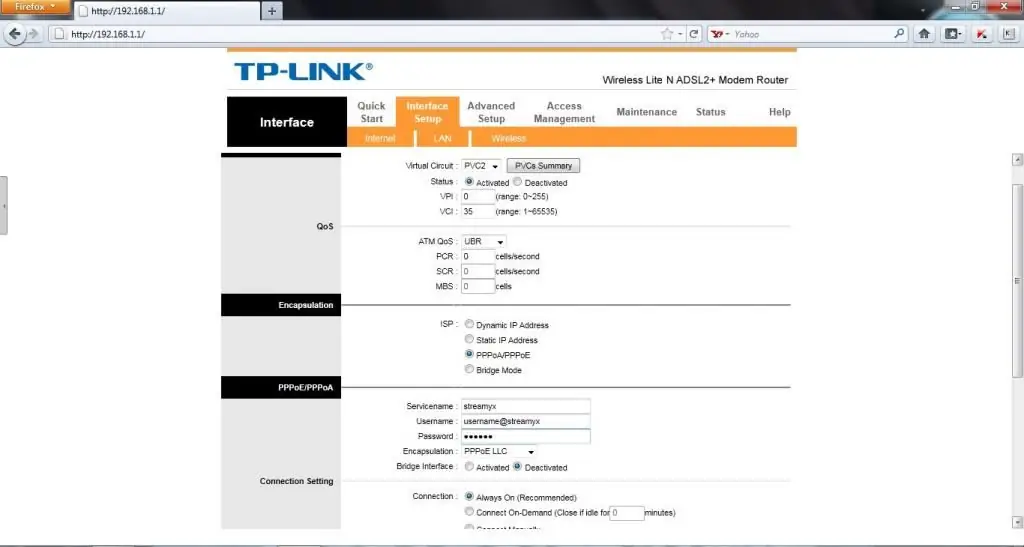
To check the settings made, go to the "Interface settings" section, using the "Internet" and "Wireless network" tabs in it.
You may need to change the values of the entered parameters in the "Internet" tab when changing the regional provider "Rostelecom" or when replacing the service provider. Make changes tothe “Wireless Network” tab may be required if mobile devices do not work satisfactorily on the selected channel in the “auto” mode, or if you want to change the password for accessing the WI-FI network. You can start setting up TP Link TD W8151N Rostelecom from this section, bypassing the "Quick Start".
Conclusion
Using the recommendations of the article in practice, the user will be able to successfully independently configure the TP Link TD W8151N Rostelecom router to work on the local network. The purchased device will successfully be able to perform the functions of a modem and router for ADSL networks.


