After buying a new mobile gadget, it becomes necessary to transfer important information from the old device. And if the necessary applications can be reinstalled, then it is quite difficult to restore lost contacts. Especially if there are more than a hundred of the latter.
Of course, you can transfer contacts from Android to Android manually, but this process is rather laborious and unpleasant. It is much more efficient to involve third-party services, utilities and other tools in this enterprise.
Let's try to figure out how to transfer contacts from Android to Android and do it as painlessly as possible for both the mobile gadget and the user himself. Consider a number of affordable and simple ways to implement this procedure. So let's get started.
Sim card
One of the easiest, but at the same time time-consuming ways to import contacts to Android is to copy the phone book to a SIM card. You should immediately warn that there is a limit on the number of subscribers - no more than 200 numbers.
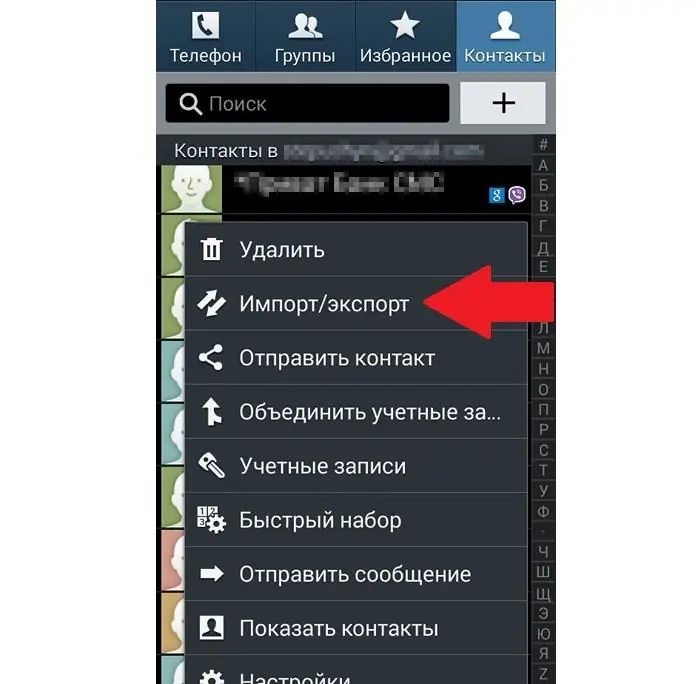
To import contacts to Android, the old device must have a valid SIM card. If there are any software or hardware restrictions on working with the phone book, then they need to be removed. Permissions or prohibitions are usually given by third-party applications. If they are not installed, then you can proceed with the import procedure.
How to transfer contacts to a SIM card:
- Open the phone book and click on the option button (three-dot icon/gear).
- The line "Settings" should appear in the drop-down list.
- Click on "Import/Export Contacts".
- After pressing the "Export" button, select "To SIM".
- Wait for the process to finish.
Next, insert the SIM card into a new smartphone and perform the same steps. The only difference is that instead of exporting, you need to choose to import contacts to the SIM card. We are waiting for the end of the procedure and check our phone book. All numbers should appear there. If there are more than 200 subscribers in your book, then it is best to import contacts to Android using one of the methods described below.
SD card
For this procedure, we need any SD card. Even a medium with the smallest amount of memory will do - 512 MB or 1 GB. Less is no longer produced. You should immediately check the performance of the card on both devices. If the external media felt great on the old phone, then it's not a fact that everything will be just as good on the new one.
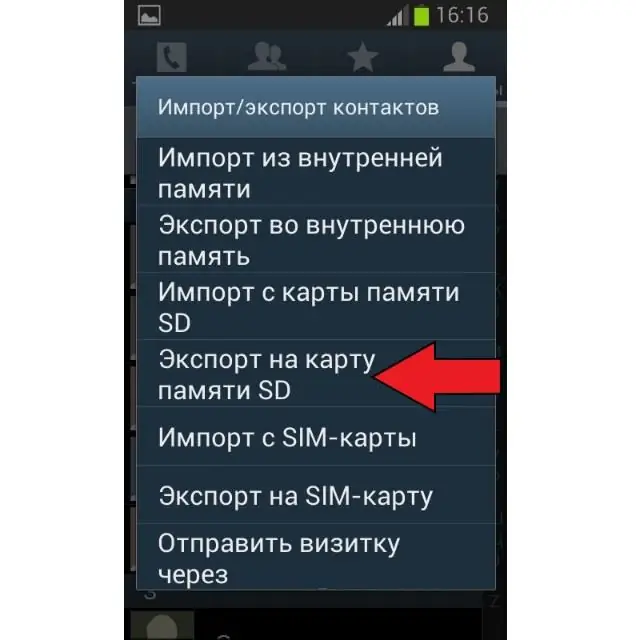
How to transfer contacts from Android to Android using SD card:
- Go to the phone book and open the options section.
- Go to Settings.
- Click on "Import/Export Contacts".
- By clicking on the "Export" button, select the SD card as the receiver.
- We are waiting for the end of the procedure.
On external media, all contacts will be saved in a specific VCF format. The file is usually located in the root directory of the SD card. If there are many subscribers in the phone book, then several archives can be created (_002, _003, etc.).
To import contacts to Android, insert the SD card into a new phone and follow the same procedure, with the only difference that instead of the "Export" button, click on the "Import" icon. In this case, there are no restrictions on the number of subscribers, as was the case with a SIM card.
Bluetooth
You can also transfer contacts using bluetooth protocol. For this procedure, you will need to transfer all subscribers from the phone book to the memory of the old phone, if previously they were located only on the SIM card.
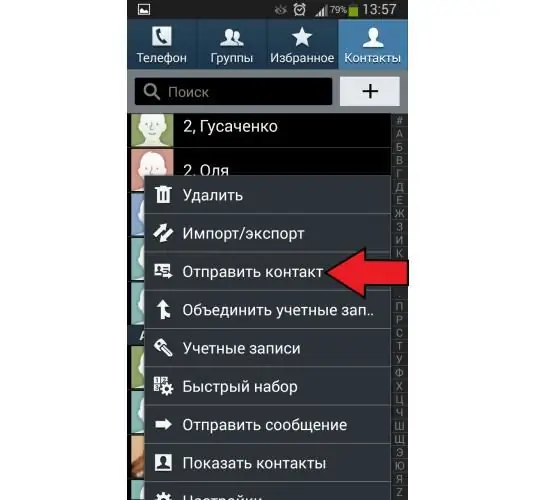
It is necessary to turn on both mobile gadgets and establish connections between them via the bluetooth protocol. If there are any problems, then you should pay attention to the "Visibility for other devices" option in the wireless settings.
Transfer contacts via bluetooth:
- Open the phone book and select "Options".
- In the drop-down menu, click on the item "SendContact".
- Select all (or necessary) contacts for transfer.
- Enter a password (optional) and agree to start the procedure.
The process of transferring data via the Bluetooth protocol is quite long, so do not be surprised if your phone freezes for a while. Especially when it comes to transferring a large number of contacts.
Google account
Practically all firmwares of "Android"-gadgets are tied to "Google" in one way or another. The services of this search engine can also be used to import contacts to a new device. If you don't have a Google account, you need to create one. The best way would be to register a mailbox. You can do this on the official website of the search engine.
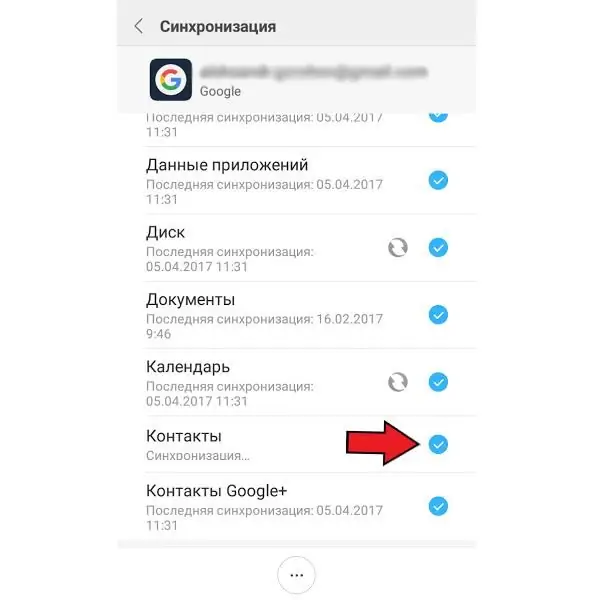
Process of transferring contacts:
- Go to the standard settings of the Android platform on the old gadget.
- Open the "Accounts" item.
- Find a valid Google account and click on it.
- In the synchronization window that appears, move the switch to the active position opposite the "Contacts" line.
- Click on "Options" and after - on "Synchronization".
Now you need to sign in to your Google account on your new mobile gadget. After some time, the phone book should be updated, and contacts from the old smartphone will appear in it. It is also worth clarifying that this method only works with numbers stored in the phone's memory.
Third Party Applications
There are special programs fortransferring contacts from Android to Android. There are a lot of similar solutions on Google Play. But separately I would like to highlight a few of the most sensible and hassle-free options.
MOBILedit
MobilEdit has proven to be a great contact transfer tool on all platforms. To transfer the phone book, you will need a personal computer and an installed utility. You can find it on the official website of the developer. The program is installed normally, so there should be no problems with the installation.
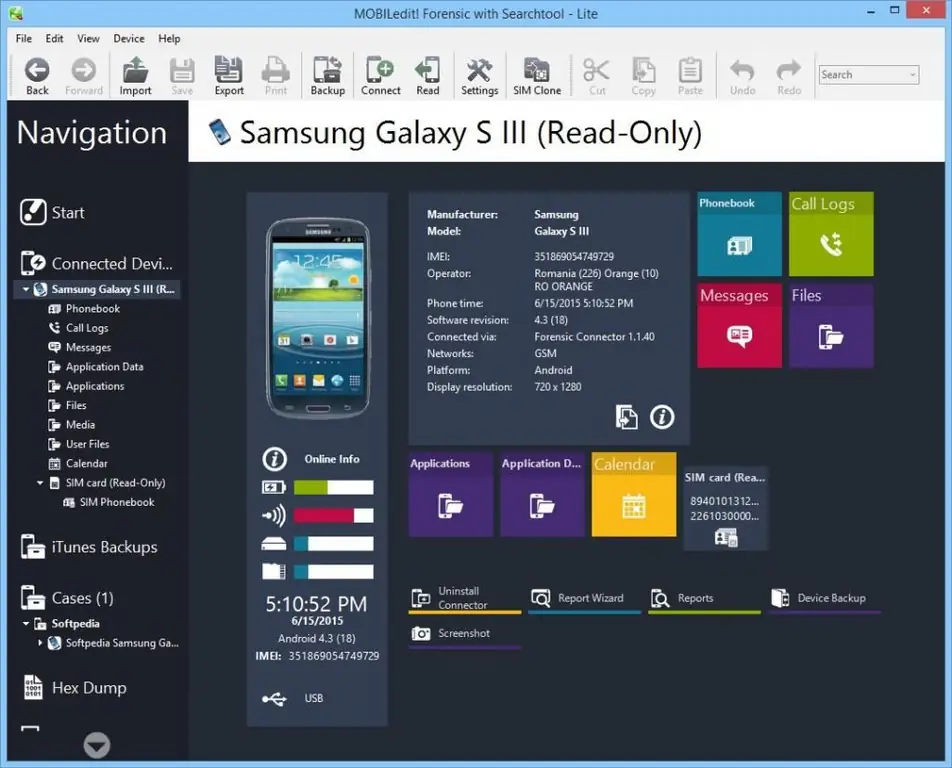
After starting, the utility will offer to download the latest drivers for mobile gadgets. To speed up this procedure, it is best to select your device model from the list provided. After the update, a window should appear informing you that the drivers have been successfully installed.
I should warn you right away that the utility does not support Russian, so you will have to remember English lessons or search for amateur localizations on thematic forums. There are quite a few of the latter, so there shouldn't be any serious problems.
Export
First of all, you need to go to the "Phone" tab and select the "Connection" item ("Connection" / "Communication", etc.). In the drop-down window, you need to click on PC Sync. In some cases, there may be a different connection name, and it depends on the manufacturer and model of the mobile gadget. Next, you need to enable USB debugging on your smartphone or tablet:
- Go to the standard settings of the Android platform.
- Find the Developer Options section.
- Put a beacon in front of the line "USB Debugging".
On some firmware the procedure is slightly different:
- Go to Settings.
- Go to the "System" section.
- Opening the Device Information window.
- Click on the "Build number" line.
- Activate the "USB Debugging" item.
Now on the personal computer in the "MobileDith" program on the panel, click on the "Export" item. In the main window, you need to select what exactly you want to copy: photos, videos, applications, or, as applicable to our case, contacts. You must also specify the file format - CSV.
Import
Then transfer the resulting archive to a new gadget. It is best to copy the file to the root directory. Next, turn off the old gadget and connect the new one. In the "MobileDith" program, open the "Import" item. Specify the previously copied file, click on OK and wait for the procedure to end.
The program is paid, but the developer has provided a trial week period. During this time, you can properly familiarize yourself with the capabilities of the utility and make a decision to buy or refuse the product. In any case, a week is enough to copy contacts.
Transfer Contacts
This is already an exclusive mobile app and no PC is required to transfer contacts. The program, like MobileDit, comes without Russian-language localization, but the problem is solved by searching for a localizer on thematic forums and websites. Based on user reviews,as such, localization is not needed here, because it is quite difficult to get confused in the utility interface.
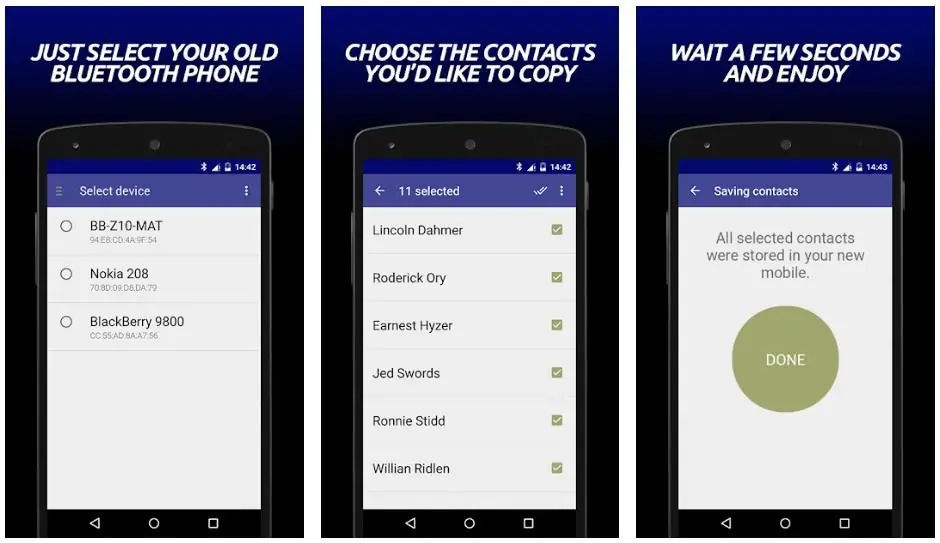
The application must be installed on both smartphones. On the old phone, select all or some specific contacts and click on the "Save" button ("Export", "Transfer", etc.). On the new device, you need to select the import source, that is, the old model and click on the "Import" item. After a couple of minutes, all previously selected contacts will be on another gadget.
One of the main distinguishing features of the application is that it works with all popular platforms. The utility transfers contacts from Android, Windows, Blackberry and iOS devices. And in any direction and in unlimited quantities.
The program is in the free distribution (Free), but its free ends at 75 contacts. If you need to transfer more, you will have to pay a subscription in the region of 70 rubles.
Syncios iOS & Android Manager Free
This is a completely free application designed to copy data from one mobile gadget to another. The program works through a personal computer and is somewhat similar in functionality to MobileLEDit.
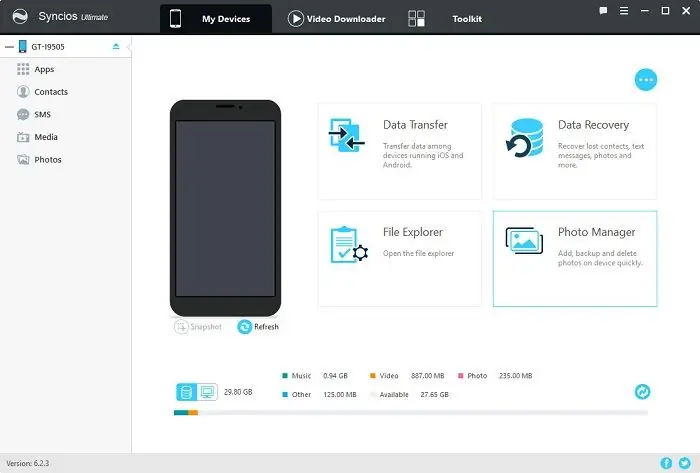
Using the utility, you can import contacts from devices running Android and iOS operating systems in any direction. In addition to phone numbers, the program allows you to copy photos, videos, calendars, music and other content.
The interface of the utility is simple andintuitive. There are special sections on exporting and importing data. Getting lost in the menu is quite difficult, even despite the lack of Russian-language localization. The only nuance that users sometimes complain about is the finicky of the software for mobile gadgets. The program does not always correctly determine the device model, and at the same time, there are some problems with both export and import.


